Cake Pop Ingredients:
Cake
Frosting
Candy Melts
Edible Decorations
Sucker Sticks (found in the baking or craft aisle)
Cake Pop Holder (some people buy holders. I've yet to get my hands on one. I have used 8 oz glasses to hold my pops while they dry and more frequently buy the Styrofoam blocks used for arranging flowers)
Start out by baking a cake (homemade or from a box) as directed. Once it's done baking let it cool completely. In a large bowl and start separating into pieces. I've heard that you can put the cake in a blender or food processor to shred up, but I prefer to use my hands. Start to crumble the cake until its in tiny pieces, the smaller the better! The picture is from a cake that had been sitting out for a couple of days (covered) and I found that the extra days really helped with the crumbling. I have made many cake balls a couple of hours after pulling it out of the oven and it works just the same, but there may be a few bigger pieces left after crumbling. Either way works.
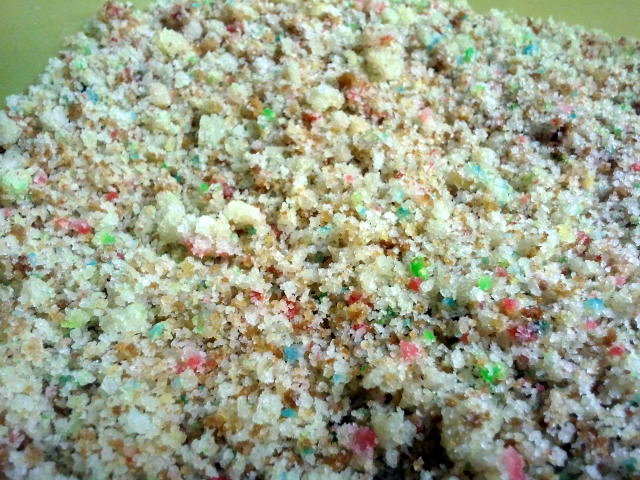
I'm partial to funfetti cake so I used it in these cake pops

Next bring out your frosting. Any flavor you want, homemade, store bought. What ever your heart desires. Put a couple of hearty spoonfuls into the crumbs. Now its time to get dirty. Shove your hands in and start mixing the cake crumbs in with the frosting. Remember that you can always add more frosting if needed but you can't take any out!!
You can see in my picture that mine became like a dough. I had also put my frosting in the fridge so it was cold and while mixing it took over the crumbs!

This was an accident. I completely spaced that I hadn't let it sit out and become room temperature...but by that time it was too late to go back! Now, I wouldn't necessarily suggest this-however it made for VERY easily molded balls! The consistency on the inside is very mushy then. When I gave these cake pops to my coworkers they actually loved the texture-said it was more like cheesecake. Its FULLY cooked but to me seemed a bit too mushy. So when mixing the frosting and crumbs do so to your desired texture-but remember to make it moist enough to mold!!!
Pull out enough of the mixture to roll into balls. Remember you don't want them TOO big because they will be overly top heavy and fall or slide down the stick. I eyeballed the amount and size I needed for each.


This next part is important not to skip! The cake balls NEED to cool to harden up a bit. You can put them in the fridge for a few hours-or if you're anxious like I am you can put them in the freezer for about a half hour. If the balls don't harden up a bit they will slide down the stick and it'll end up being a disaster!
This does, however, give you time to get everything ready for decorating!!

I used sprinkles and coconut shreds. I grabbed any thing I had in the kitchen for these cake pops since they I was making them for fun and to bring to work.
Grab your bag of candy melts and a deep bowl. The deeper the easier it will be to dip the cake pops into. Spooning the melts over the pop has proved tedious so make sure you can get most of the ball in the melt and then you'll be able to spoon just a little over the bottom or roll the stick to get the bottom covered. Make sure to follow the directions on the candy melt package. You'll want to put your microwave on the defrost setting to melt these, otherwise the melts cook and become unusable. ALSO DO NOT mix liquid food coloring into the candy melts. It hardens it and will not remelt. That's how I ended up making green pops instead of yellow chicks for Easter!!!
Get everything ready to put together. Pull out your hardened balls, decorations and sticks. Once the candy melt is melted down you'll want to move quickly so you have plenty of 'dip time' before it hardens and has to be remelted!

Place the tip of a candy stick into the candy melt and push into a cake ball. Then put the cake ball in the candy melt and cover the entire ball. Then very lightly tap off the excess candy melt. Spin slowly so it falls off evenly but not so hard that the entire ball falls off. If you're covering your cake pop in decorations now is the time to get them onto your cake pop. Put over your bowl filled with sprinkles (or whatever you have) and grab a handful. Rotate your stick while sprinkling over top of the pop. Then put in your cake pop holder and allow to dry! They dry relatively quick but be sure the pops don't touch any thing until they do.

And there you have it! Cake Pops! Look online for fun ideas on how to decorate or new techniques!
These are so much fun to make and people LOVE them! Here are some of the other cake pops I have done:
These two are my very first attempts!


These were my favorite to make! I'm such a huge football fan that I had to try molding and making little footballs!


I had a blast making these!